
TECHNIQUE BLOG USING DESIGNER SERIES PAPER (DSP)

Hey, everyone!! Today's blog is a "technique" blog using Stampin' Up! Designer Series Paper or DSP. For this card, I used the Garden Impressions DSP in a slightly different way. I cut strips to create a "sunburst" design as my background. The patterns and colors of this paper are just beautiful! I paired the DSP with the Abstract Impressions stamp set. Follow along as I show and tell you how I created this card.

I started with a piece of Whisper White cardstock and cut it to 4' x 5 1/4'. I picked 4 different designs from the Garden Impressions DSP. This was a difficult decision because this paper is just beautiful. I cut a piece of DSP measuring 6" x 1 1/2" strip from each of the 4 patterns. Then I cut each strip from the top left corner to the bottom right corner to make 8 triangle strips.
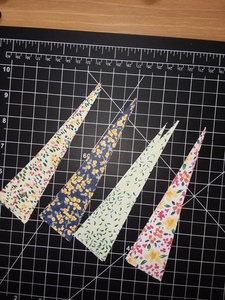
These triangles will create the sunburst pattern.
I laid out my pattern before gluing the strips down so that I could visually see how I wanted them placed.
I started by choosing a bold pattern that was eye-catching and glued that piece down in the middle. I started gluing pieces down, leaving a small space between each triangle of DSP.

Once I finished gluing all the triangles down, I flipped the panel over and trimmed off all the edges being careful not to cut the panel itself. I can't believe how pretty it turned out!

Once my panel was finished, I cut 1//8' off of the top and side so my finished panel was 5 1/8' x 3 7/8'. I cut a piece of Night Of Navy cardstock to 5 1/4' x 4' and glued this piece to layer my finished panel onto.

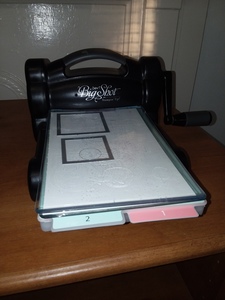
Next, I took another piece of Whisper White cardstock and using the Stitched Shapes Framelits Dies, cut the 2 largest squares using my Bigshot. Using Night Of Navy ink, I stamped the sentiment from the Abstract Impressions stamp set on the smaller square. I used Stampin' Dimensionals to adhere the smaller square to the larger square. I glued this piece to my sunburst panel then glued the entire panel to the Night Of Navy layer. I glued the entire finished panel to a Whisper White card base measuring 8 1/2' x 5 1/2' and folded in half.
I am very happy with the way the colors and patterns play off each other.

The layered sentiment adds just the right dimension to this simple yet elegant card.

This card is very simple to make and you can use any patterned paper or colored cardstock you have. You can change up the sentiment to create a card for any occasion.
Thank you so much for looking at my blog today. If you have any questions or would like to order any of the products that I used to create this card, please contact me. I would be happy to help you in any way and would love the chance to earn your business. Have a great evening!!
 Big Shot
143263
Big Shot
143263
 Whisper White 8-1/2" X 11" Cardstock
100730
Whisper White 8-1/2" X 11" Cardstock
100730
 Night Of Navy 8-1/2" X 11" Cardstock
100867
Night Of Navy 8-1/2" X 11" Cardstock
100867
 Night Of Navy Classic Stampin' Pad
147110
Night Of Navy Classic Stampin' Pad
147110
 Stitched Shapes Dies
145372
Stitched Shapes Dies
145372
 Multipurpose Liquid Glue
110755
Multipurpose Liquid Glue
110755
 Garden Impressions 6" X 6" (15.2 X 15.2 Cm) Designer Series Paper
146289
Garden Impressions 6" X 6" (15.2 X 15.2 Cm) Designer Series Paper
146289
 Abstract Impressions Photopolymer Stamp Set
147513
Abstract Impressions Photopolymer Stamp Set
147513


 Stampin' Trimmer
126889
Stampin' Trimmer
126889